Archive for the ‘Desserts’ Category

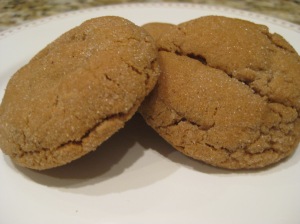
Molasses Cookies

February 3, 2013

IMG_9560I don’t know about you, but I have two types of stores that I could literally live in (while handing over my full paycheck in exchange for goods!). Kitchen stores (ie: Sur La Table) and spice stores (ie: Penzey’s). And the funny thing about spice stores is that I don’t even really need to be on the lookout for a spice to spend a good half hour in this olfactory heaven. I just glance at the spices available, and the recipes that they generally display to get your creative juices flowing.

So last time I was at Penzey’s, I spotted a recipe for Molasses Cookies. At first glance I thought to myself, not sure I have ever made those and it has probably been since childhood last time I tasted them. But, I started thinking that a spiced cookie would be delicious in the winter – might even warm me up!

This recipe is originally from Linda Aukerman and to my surprise, has no butter. Apparently, when baking with just shortening (vs butter) it really affects the texture of the cookie. And I have to admit, the crunchy outside and super chewy inside is worth the ingredient switch. And, combined with the warming spice mixture, make this cookie amazing.

These cookies were a clear winner the minute we tasted them – or quite possibly the moment they came out of the oven and we could smell them. They also disappeared at work quite quickly.

Thanks to Penzey’s and Linda Aukerman for sharing a recipe that does warm me up on a cold winter night!

MOLASSES COOKIES
1 1/2 cups shortening, melted and cooled (do NOT substitute butter)
2 cups sugar
1/2 cup molasses
2 eggs
4 cups flour
4 tsp baking soda
1 tsp ground cloves
1 tsp powdered ginger
2 tsp cinnamon
1 tsp salt
1/3 cup extra sugar or vanilla sugar for rolling (if you have a Penzey’s or spice shop nearby and can get the vanilla sugar, I highly recommend it!)

To the melted, cooled shortening add: the sugar, molasses and eggs. Beat well with hand mixer. In a separate bowl, sift together the dry ingredients. Add the dry ingredients to the wet ingredients, mixing to incorporate. Chill for at least an hour (can make the dough ahead and make the cookies the next day if desired). Preheat oven to 375. Using about a tablespoon of dough, form into balls. Roll in sugar and place on ungreased cookie sheets (although I would recommend a silicone mat or parchment paper), about 2 inches apart. Bake at 375 for 8-10 minutes. Check at 8 minutes. You want them to flatten but still be soft. Let the cookies cool for at least 2 minutes before removing them from the pan, as they can break if you try to pick them up when they are very hot. Cool on a cooling rack.

Tiramisu

September 29, 2012

My favorite dessert is hands down tiramisu. Not because it is an Italian food (although that doesn’t hurt) but because there is something about coffee-soaked ladyfingers, chocolate and cream filling that just makes me happy. And I mean REALLY happy.

But it always seemed such a daunting task to actually make it by hand, and therefore my experience had been limited to restaurants. But, for Valentine’s Day last year, I decided of all desserts to know how to make, this one seemed essential. The only “hard” thing about this dish is planning ahead, since you need to make it the night before consuming. But otherwise, I was pleasantly surprised at the simplicity. Do be careful of soaking the ladyfingers too long, as they will fall apart in your hands. The good news is, after destroying a few, I started getting the hang of it!

Thanks to Gourmet for this recipe which will now be my default when I am craving my favorite sweet treat. Bon Appetit!

TIRAMISU

6 Servings

  • 3 large eggs, separated
  • 3/4 cup sugar
  • 1 (8-oz) container mascarpone cheese (1 scant cup)
  • 1/2 cup chilled heavy cream
  • 2 cups very strong brewed coffee or brewed espresso, cooled to room temperature
  • 2 tablespoons sweet Marsala wine
  • 18 savoiardi (crisp Italian ladyfingers, 6 oz)
  • 1/4 cup fine-quality bittersweet chocolate shavings (not unsweetened; made with a vegetable peeler) or 2 tablespoons unsweetened cocoa powder

Beat together yolks and 1/2 cup sugar in a large bowl with an electric mixer at medium speed until thick and pale, about 2 minutes. Beat in mascarpone until just combined.

Beat whites with a pinch of salt in another bowl with cleaned beaters until they just hold soft peaks. Add remaining 1/4 cup sugar a little at a time, beating, then continue to beat whites until they just hold stiff peaks. Beat cream in another bowl with cleaned beaters until it just holds soft peaks. Fold cream into mascarpone mixture gently but thoroughly, then fold in whites.

Stir together coffee and Marsala in a shallow bowl. Dip 1 ladyfinger in coffee mixture, soaking it about 4 seconds on each side, and transfer to an 8-inch glass baking dish (2-quart capacity). Repeat with 8 more ladyfingers and arrange in bottom of dish, trimming as needed to fit snugly. Spread half of mascarpone mixture evenly over ladyfingers. Make another layer in same manner with remaining ladyfingers and mascarpone mixture. Chill tiramisu, covered, at least 6 hours.

Just before serving, sprinkle with chocolate.

Baby Ruth Cookies

November 7, 2011

If you are like me, you tell yourself you won’t buy the Halloween candy that you have a weakness for, yet somehow it always ends up in your pantry. And eventually, your stomach. For me, that candy bar is a Baby Ruth. So, every Halloween, I have a bowl full of extra Baby Ruths that I continuously eat during the remainder of the week.

So this year I thought I would get a bit crafty – “what if my favorite candy bar were a cookie?” So, I took my remaining Baby Ruths, chopped them up, and put them in my favorite basic cookie recipe (from The Cookie Book by Peggy Cullen).

So during the 11 minutes the cookies were in the oven, magic happened. The nougat melted and turned chewy and sweet, and the peanuts and chocolate infused the entire dough. These might actually be the best cookies I have ever made.

So, my Halloween experiment turned into a new favorite. And, I would bet that your favorite Halloween candy would also be worth the little experiment of seeing how it translates into a cookie.

So, thanks to my basic cookie recipe and Halloween imagination for inspiring my new favorite cookie!

BABY RUTH COOKIES
2 dozen

2 ounces (1/2 stick) unsalted butter, softened
6 tablespoons granulated sugar
6 tablespoons packed light brown sugar
1/4 salt
1 1/2 teaspoons vanilla extract
1 large egg
1 cup plus 2 tablespoons all-purpose flour
1/2 teaspoon baking soda
7-10 fun size Baby Ruth candy bars, chopped

Preheat oven to 375 degrees. In a medium bowl, using an electric mixer, beat the butter, sugars, salt and vanilla until well combined. Beat in the egg. Scrape down the bowl using a rubber spatula and beat for a few more seconds.

In a small bowl, whisk together the flour and baking soda. Add the dry ingredients to the wet mixture and mix on low speed just until absorbed. Combine the Baby Ruth pieces into the dough.

Shape the dough into 1 1/2-inch balls and drop them about 3 inches apart onto baking sheets. For perfectly uniform cookies, scoop the dough using a 1 1/2-in cookie scoop, leveling the dough off across the top before dropping onto the baking sheets. Bake for 11 minutes, or until the edges are golden. Let sit for 5 minutes, then transfer to wire racks to cool completely.

Chocolate Covered Macaroons

May 19, 2011

What I find in my cooking and baking is that sometimes amazing recipes come from unexpected places. I recently blogged about a recipe a woman got from her mother’s blender box. Sometimes I look at the back of a chocolate wrapper and steal that recipe for my own. And sometimes you are on a airplane traveling for business, catching up on your People magazines (fortunately it is official work reading) and you see a celebrity recipe and think “wow, that does look amazing!”

So, when the torn out macaroon recipe found its way to my dining room table later on that week, my husband innocently asked “oh, is this what you are baking this weekend?” (and for those who know me know that wasn’t a subtle hint, but a realistic question). He inspired me to give it a try.

Having never made macaroons before, I was a bit concerned, but optimistic when I revisited the short ingredient list. Coconut, sweetened condensed milk, sour cream, vanilla, cream, baked and dipped in chocolate I figured I could handle the challenge.

Let me start off by saying I am not sure I could have made this recipe without my cookie scoop so if you don’t have one, use this as your excuse to buy one. Also, don’t “save a step” by not dipping them in chocolate. The dish isn’t complete without it. Also, the recipe says it makes 24, well I got 40 (perhaps my scoop is small).

So 40 macaroons later my husband and I tried one and were speechless. So easy to make, yet SO good. They made their way into my office Monday (gone in minutes) as well as my husband’s office (gone in seconds). So, as people continue to ask me for the recipe, I thought I would divulge my unexpected source and share in my secret.

So, thank you to People magazine (and Jill Zarin of The New York Housewives) for this fantastic sweet treat!

CHOCOLATE COVERED MACAROONS
Makes 40 (although recipe says 24, if you use a larger ice cream scoop)

2 (14-ounce) bags shredded coconut
1 (14-ounce) can sweetened condensed milk
2 Tablespoons sour cream
1 Tablespoon heavy cream
1 1/2 teaspoons vanilla
12 oz of bittersweet chocolate (I used Ghirardelli and mixed in a little bit of milk chocolate. I would assume any chocolate combination would do! Maybe next time I will do semi-sweet…)

Preheat the oven to 325.

Mix together in a large bowl the sweetened condensed milk, sour cream, heavy cream, and vanilla. Add the shredded coconut.Mix together. Make sure that all of the coconut is covered with the milk mixture. Use a cookie scoop and place mounds on parchment lined baking sheets or silicone lined baking sheets.

Bake at 325 degrees for 20 to 25 minutes or until the coconut is nicely browned. Cool completely on a cooling rack. Melt the chocolate in a double boiler. Dip the macaroon halfway. Let the chocolate harden in the fridge (on a wax paper lined jelly roll pan) at least 20 minutes before serving.

Oatmeal Cookes

March 28, 2011

I have to admit that when I was a child, I wasn’t always the biggest oatmeal cookie fan. It wasn’t that I didn’t like them, necessarily, but when faced with a choice of something people called “healthy” vs. something studded with the terrible-for-you chocolate. Well. You know who won.

But the very reason I avoided oatmeal cookies growing up, seems to be the reason I am starting to become a fan. When eating a cookie, knowing I am getting healthy oats and fruity raisins seems to make me in denial of the plentiful sugar and butter components. And when I made this recipe, the chewiness (due to the brown sugar) and flavorful dough (did someone say butter?) made me wonder if faced with the oatmeal vs. chocolate question, would I still pick chocolate? Jury is still out, but I now add these oatmeal cookies to the “things I crave” list. So, if you need one stand-by oatmeal cookie recipe this is the one. Thanks to Bon Appetit’s Just Desserts cookbook for this perfect oatmeal cookie recipe!

OATMEAL COOKIES
Makes about 2 dozen

1 cup unbleached all purpose flour
1/2 teaspoon baking powder
1/2 teaspoon baking soda
1/4 teaspoon salt
1 cup (packed) brown sugar
1/2 cup (1 stick) unsalted butter, room temperature
1 large egg
1 teaspoon vanilla extract
1 and 2/3 cups old- fashioned oats
1 cup raisins

Position 2 rack in the top third and 1 rack in the bottom third of oven and preheat to 350 degrees. Live 2 heavy large rimmed baking sheets (or cookie sheets) with silicone baking mats or parchment paper. Whisk flour, baking powder, baking soda, and salt in medium bowl to blend. Using electric mixer, beat brown sugar and butter in large bowl until very well blended. Beat in egg and vanilla. Mix in flour mixture, then stir in oats and raisins.

Using trigger cookie scoop and about 2 tablespoons dough per cookie, arrange mounds of dough on prepared baking sheets, spacing 2 inches apart. Bake cookies until golden brown, reversing baking sheets halfway through baking, about 14 minutes total. Transfer cookies to rack and cool completely.

Almond Joy Cheesecake

March 14, 2011

So I might lose a bit of credibility here, to disclose that I have only baked as many cheesecakes as I can count on one hand. They always tend to scare me – don’t want to overbake, don’t want to underbake. But the thing about cheesecakes (other than being delicious) is that they are ALWAYS impressive. They look so beautiful, complicated to make, and flavorful to boot.

So one day this winter I was craving making something a bit more “elaborate” than brownies, cookies or the typical baked goods. So, one random Sunday, I made a cheesecake. But, to mix it up, I thought I would try this cheesecake that promised to taste like Almond Joy.

The thing that this cheesecake taught me is that I have been slightly afraid of pretty much nothing. The cheesecake is so easy to make – and you start to get a feel for what a “done” center should really be like. It won’t wiggle in the middle, but it doesn’t look like a chocolate cake, either.

The crust might make this cake – it is amazing. The coconut and almond combination are so delicious, and the crunchy-texture balances out the smooth, rich filling.

This cheesecake is a great one to serve for company because it is so impressive with the chocolate topping and little bit of decoration. It is a lot of cake, so if you don’t have a neighbor to bring it to (like I did after devouring a few pieces) then I would plan this one for company. Also, don’t forget you should give it a night to solidify (although I sneaked a piece the night after I made it and it seemed to hold up ok, but I wouldn’t take that risk if you are making for company!).

Thanks to Bon Appetit Just Desserts for this one. I think it has given me the confidence to try a few more cheesecakes in my baking career!

ALMOND JOY CHEESECAKE

Crust:
1 1/2 cups graham cracker crumbs
1 1/2 cups sweetened flaked coconut, toasted
1/2 cup sliced almonds, toasted (about 2 ounces)
1/4 cup sugar
1/2 cup (1 stick) unsalted butter, melted

Filling:
4 8-ounce packages cream cheese, room temperature
1 cup sugar
4 large eggs
1 cup sweetened flaked coconut, toasted
1 tablespoon coconut extract
1 cup sliced almonds, toasted

Glaze:
1 cup semisweet chocolate chips
3/4 cup whipping cream
1 1/2 teaspoons vanilla extract

For crust: Preheat oven to 350°F. Wrap outside of 9-inch-diameter springform pan with 2 3/4-inch-high sides with foil. FInely grind cracker crumbs, coconut, almonds and sugar in processor. Add butter; process until moist crumbs form. Press mixture onto bottom and 1 inch up sides of pan. Bake crust until set and beginning to brown, about 12 minutes. Cool. Reduce oven temperature to 325°F.

For filling: Using electric mixer, beat cream cheese and sugar in large bowl until smooth. Add eggs 1 at a time, beating just until blended after each addition. Mix in coconut and extract . Fold in almonds. Transfer filling to crust. Bake until cake is puffed and no longer moves when pan is shaken, about 1 hour 15 minutes. Cool completely on rack.

For glaze: Combine 1 cup chocolate chips, cream and vanilla in small saucepan. Stir over medium-low heat until smooth. Cool until glaze begins to thicken but can still be poured, about 30 minutes. Pour glaze over cooled cake; spread evenly. Chill cake overnight.

Run small knife around sides of cake to loosen. Release pan sides.

Coconut Bars

February 13, 2011

This past January, I spent 10 nights away from home on a business trip. My husband can certainly fend for himself – he was single for years before he met me after all. He is perfectly capable of dialing for takeout or making a simple meal for one. But, when you get married, you settle into roles. I make dinner, he takes out the trash. I scoop the kitty litter and he gets our cars cleaned. And, when I go out of town, I feel bad for putting my chores into his court.

So, I knew if I could at least make some sweets before leaving town, he would have something to nibble on that was made for him with love.

I had just bought The Gourmet Cookie Book which has the best cookie recipe from Gourmet magazine from the 1940s on. What I love about the book is not only the timeless classics, but the amazing photos of every recipe in the book. I made the coconut bars from 1953 because I had all the ingredients on hand – and it seemed a bit different.

These are sweet, so cut your pieces smaller than I did. But, they are simply amazing, and really require little ingredients. With some powdered sugar on top, they are beautiful as well.

So, if you are leaving town and want your family to have an always satisfied sweet tooth, these are great treats to leave behind!

COCONUT BARS
Makes 2 dozen

1/2 cup butter, softened
1 1/2 cup brown sugar, divided
1 cup plus 2 tablespoons flour, divided
2 eggs
1 teaspoon vanilla
1/2 cup shredded coconut
pinch of salt
1/2 cup chopped walnuts

Preheat oven to 375.

Cream 1/2 cup butter. Add gradually 1/2 cup brown sugar and beat until smooth. Stir in 1 cup sifted flour and spread the batter in the bottom of an 8-inch square cake pan, buttered. Bake for 20 minutes.

Beat 2 eggs and 1 cup light brown sugar until smooth. Stir in 1 teaspoon vanilla, 1 cup chopped walnuts, and 1/2 cup shredded coconut tosses with 2 tablespoons flour and a pinch of salt. Spread this batter over the baked crust and continue to bake for 20 minutes longer. Cool, sprinkle with powdered sugar, and cut into squares or bars.

Peanut Butter and Jelly Thumbprints

February 6, 2011

When making cookies for some friends and their two kids, I figured I would make something fun, playful and something that is a sure winner with little ones. Chocolate is always a good bet (and I have plenty of recipes in that arena) but when I saw a recipe for classic peanut butter cookies, I figured that is a kid-friendly recipe as well. Then, when I read that you can make them into thumbprints with jelly to create peanut butter and jelly cookies, I knew I had to try it.

Last I checked, I am much too old to be considered a child, but I personally fell in love with these cookies. The basic peanut butter cookie recipe is hands down the best I have had, and the raspberry jelly I added gave it a great sweetness to offset the salty.

So, if you want to make something kids will enjoy (or the kid in you!), give these a try. Thanks Bon Appetit Desserts for this recipe.

PEANUT BUTTER AND JELLY THUMBPRINTS
Makes about 2.5 dozen

2 cups unbleached all purpose flour
1/2 teaspoon baking soda
1/2 teaspoon salt
1/2 cup (1 stick) unsalted butter, room temperature
3/4 cup sugar
1/2 cup packed brown sugar
2 large eggs
1 cup old-fashioned (natural) salted crunchy peanut butter (preferable organic)
Raspberry/Strawberry jam (optional)

Preheat oven to 350 degrees. Live 2 heavy large rimmed baking sheets with parchment paper or silicone baking mats. Whisk flour, baking soda, and salt in small bowl to blend. Using electric mixer, beat butter and both sugars in large bowl until fluffy. Beat in eggs. Add peanut butter and mix just until combined (do not overmix). Stir in flour mixture.

Form dough into gold-ball-size balls and arrange on baking sheets, spacing 1 inch a part. Either use a fork and flatter in a crosshatch pattern OR indent each ball with the back of a 1/4 teaspoon then fill with jam to create thumbprint. Bake cookies until golden brown on bottom, about 20 minutes. Transfer to rack and cool.

Pecan Lace Sandwich Cookies with Orange Buttercream

December 21, 2010

When I first made this recipe, I thought I had done it all wrong. The dough was barely existant (looked like enough for maybe 6 cookies), the texture was greasy and sticky (not like normal dough) and there were no levening ingredients (no eggs, baking soda, etc.). Then, when I read I was only to put 1 teaspoon of dough on the baking sheet per cookie I was certain this was destined for failure.

My fear was clearly unwarranted because I had never made a lace cookie before. Lace cookies are named for the lace-like holes in the cookie when they are baked. They are light, crisp and delicate, and require nothing to leven because they spread (and don’t worry, they really do spread!). So, when you know that what you think feels wrong is indeed right, these cookies are insanely simple to make!

The cookie is flavorful and crispy and the icing is amazing. You don’t need much icing to make them yummy – and too much might make them sickly sweet. Another word of advice is to make all the balls when the dough is warm. So, when you fill your cookie sheet and put it in the oven, roll up the remainder of the balls and place on a place so you have them ready to go before the dough hardens and gets tough to work with.

This is a great holiday recipe and looks so much more complex than it is to make.

So, when you are looking at your dough like you have done something wrong – trust in yourself and throw them in the oven. You too will be surprised to pull a delicious lace cookie out 11 minutes later!

Thanks to Bon Appetit for this one!

PECAN LACE SANDWICH COOKIES WITH ORANGE BUTTERCREAM
Makes about 18

Cookies:
1/4 cup (1/2 stick) unsalted butter, room temperature
1/3 cup sugar
2 tablespoons light corn syrup
1/3 cup all purpose flour
1 cup coarsely ground pecans (about 4 ounces)
1 teaspoon vanilla extract

Filling:
1 cup powdered sugar
1/4 cup (1/2 stick) unsalted butter, room temperature
1 tablespoon orange juice
3/4 teaspoon grated orange peel

For cookies:
Position rack in center of oven and preheat to 350°F. Line 2 baking sheets with parchment paper. Stir butter, sugar, and corn syrup in heavy medium saucepan over low heat until melted and smooth. Bring to boil over medium-high heat, stirring constantly. Remove from heat. Stir in flour. Add nuts and vanilla; stir to combine.

Drop dough by teaspoonfuls onto prepared baking sheets, spacing 2 inches apart. Bake cookies, 1 sheet at a time, until bubbling and lightly browned, about 11 minutes. Cool on sheets 10 minutes. Transfer to rack; cool completely.

For filling:
Whisk all ingredients in medium bowl until smooth. Spread 1 teaspoon filling onto bottom of 1 cookie. Top with second cookie, bottom side down, pressing lightly to adhere. Repeat with remaining cookies. (Can be made 2 days ahead. Store between sheets of waxed paper in airtight container at room temperature.)

Triple-Chocolate Cranberry Oatmeal Cookies

December 17, 2010

It is always a plus when you are making a holiday treat and can include the festive colors of the holiday season. I generally go for taste over presentation for my holiday sweets, but when I saw this recipe, I had high hopes for the best of both worlds.

I have never really baked much with cranberry, but knew this recipe would be so beautiful with the flecks of festive red among the rich chocolate. They turned out not only beautiful (although I will admit I need to work on my chocolate drizzling skills), but very delicious. The cranberry, turns out, isn’t just for looks. The tart flavor cuts through the richness of three types of chocolate – creating a very balanced and delicious cookie!

Thanks to Bon Appetit for this winning cookie recipe – the perfect winter cookie!

TRIPLE-CHOCOLATE CRANBERRY OATMEAL COOKIES
Makes about 30

1 cup all purpose flour
1/2 teaspoon baking soda
1/2 teaspoon cinnamon
1/4 teaspoon salt
10 tablespoons (1 1/4 sticks) unsalted butter, room temperature
1/2 cup sugar
1/2 cup (packed) golden brown sugar
1 large egg
1 teaspoon vanilla extract
1 cup old-fashioned oats
1/2 cup semisweet chocolate chips
1/2 cup milk chocolate chips
1/2 cup white chocolate chips
1/2 cup coarsely chopped fresh or frozen cranberries
2 ounces milk chocolate or white chocolate, chopped (for drizzling)

Position rack in center of oven and preheat to 350°F. Line 2 large rimmed baking sheets with parchment paper. Whisk flour, baking soda, cinnamon, and salt in medium bowl to blend. Using electric mixer, beat butter and both sugars in large bowl until smooth. Beat in egg and vanilla. Add flour mixture and oats and stir until blended. Stir in all chocolate chips and cranberries.

Drop batter by rounded tablespoonfuls onto prepared sheets, 2 inches apart. Bake cookies, 1 sheet at a time, until edges are light brown, about 16 minutes. Cool on sheets 5 minutes. Transfer to rack; cool completely.

Stir chopped milk chocolate in top of double boiler until melted and smooth. Using small spoon, drizzle melted chocolate over cookies in zigzag pattern. Let stand until milk chocolate sets, about 1 hour. (Can be made 2 days ahead. Store in airtight container at room temperature.)